

How To Repair Car Dent
Car Dent Repair: How to Prepare a Dent In Your Automobile
DIY dent repair saves hundreds of dollars
Every editorial product is independently selected, though we may be compensated or receive an chapter commission if you purchase something through our links. Ratings and prices are accurate and items are in stock as of fourth dimension of publication.
Introduction
If you follow these steps, you can patch a car dent yourself in merely an afternoon and save a few hundred bucks over body store prices.
Tools Required
Materials Required
- Trunk filler
- Finishing coat
- Latex gloves
- Sandpaper
- Tack textile
- Wax remover
We've patched quite a few car scratches and dents in our day. We used to do it the same fashion we tape drywall, by applying v pounds of body filler and so sanding off 4-9/10 lbs. And so we went to "kicking camp" at 3M and learned in that location's an easier fashion (as in, the correct way) to do automobile body repair.
We asked expert Jenn Cook, a senior technical service engineer at 3M, to walk y'all through the same car paring repair process. Once the car dent repair is patched, you just spray on a primer coat and matching paint from the dealer or an motorcar parts store. The repair won't look like a professional task, just at least information technology won't stand up out like a sore thumb. Here's the procedure.
Project step-by-step (6)
Stride 2
Remove the Paint
- Start by removing the paint within and around the paring with 24-dust newspaper.
- Switch to 80-grit sandpaper and manus-sand the unabridged dent.
- Use the same sandpaper to rough up and feather the paint around the edges of the dent.
- Clean the entire surface area with wax remover and a clean rag.
- And so wipe with a tack material.

![]()
Step three
Mix the Filler
- Spread the filler downward the mixing board in an Due south-shaped bend.
- Then scoop information technology upward and fold it over.
- Repeat until the filler has a consistent color.
- Don't mix torso filler on a scrap piece of cardboard. Instead, apply a mixing lath or an old, make clean cookie sheet you're willing to toss.

Step 4
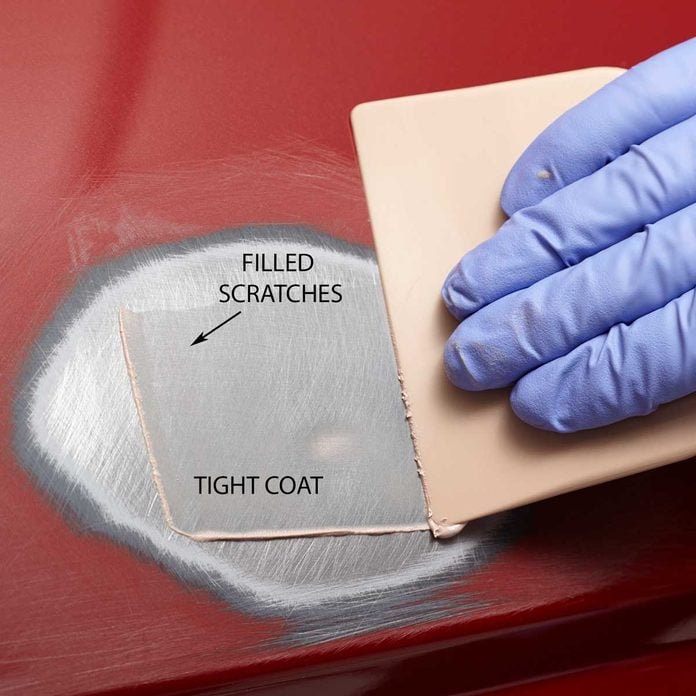
Apply a "Tight" First Coat
- Scoop upward some filler and press it hard into the rough metal.
- Spread the filler to form a "tight" coat. That will burp air out of the scratches and wet the bare metal.
Step 5
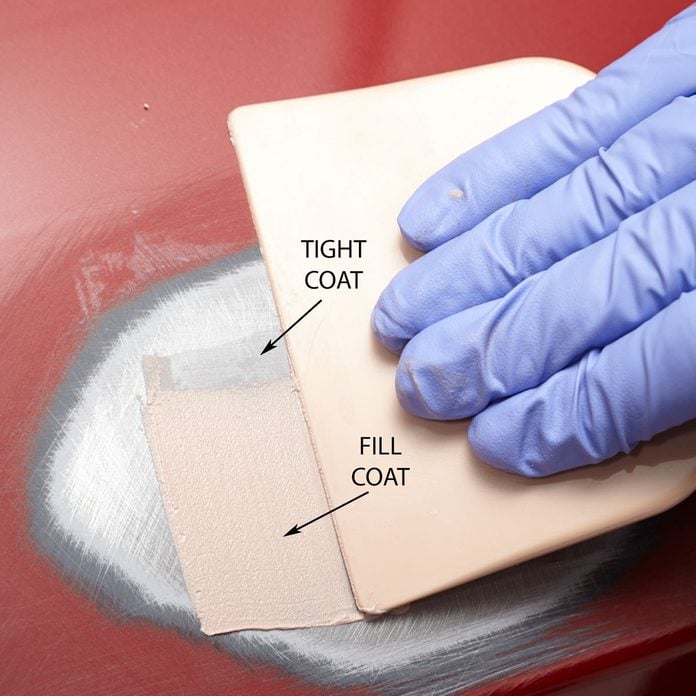
Add More than Filler
- Wipe on a thicker "fill up coat" layer of filler to completely fill the dent.
Footstep 6
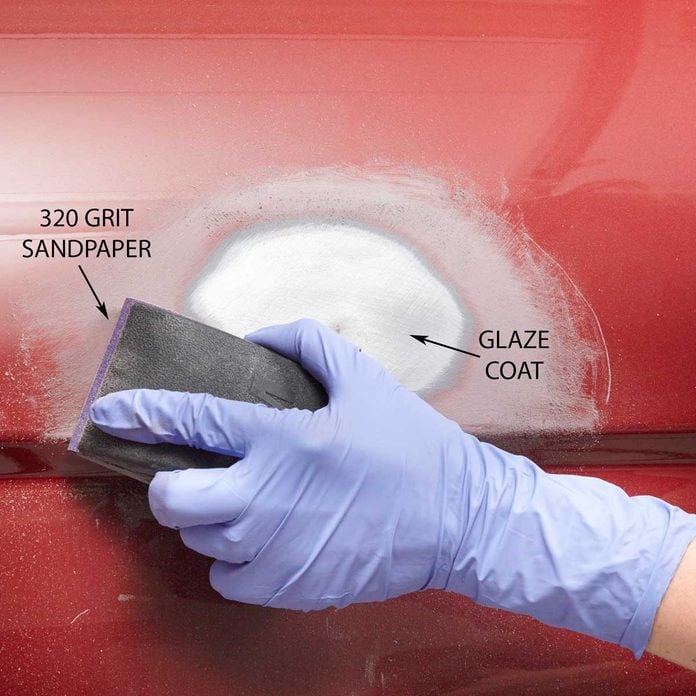
Sand to Shape and Coat
- Sand the filler to match the contours of the car body using 80- and 180-grit sandpaper.
- Then feather the edges of the filler right up to the painted edge.
- Next, utilize finishing glaze to the entire patch and then sand with 180-grit then 320-grit sandpaper.
- Spray the patch with primer, then paint it.
- Use DIY auto pigment sealant to go along the patch looking fresh.
Originally Published: October 15, 2022
Source: https://www.familyhandyman.com/project/fix-car-dents-yourself/
0 Response to "How To Repair Car Dent"
Post a Comment